


Every creator I know is sitting on a graveyard.
Not a “what do I post next” problem — the opposite. It’s the pile of stuff you already made. Posts, essays, newsletters that did one lap, got their moment, and went quiet. You spent hours on an article, it landed, and now it’s just… sitting there. Gathering dust.
The usual advice is “repurpose it…turn that post into a video.” Sure. Except turning one article into a TikTok-ready video by hand is its own part-time job: script, visuals, captions, editing. So most of us never do it. The archive keeps growing. The dust keeps settling.
Here’s my take on that: the wrong answer is “hustle harder.” The right answer is a system…something you build once that turns a task you’d never do manually into a single command you actually run. As Vinayak puts it in the piece: you don’t build a habit, you build a machine that runs the habit for you. That’s the whole game.
That’s why this guest post stopped me.
Vinayak Ramesh had 87 articles gathering dust. A full-time research job, a Substack, a Medium account he posts to three or four times a week…and a backlog he was never realistically going to turn into video by hand. So he built a pipeline in Claude Code that does it for him: drop in any article, run one terminal command, and 8–15 minutes later you get back a finished vertical video plus a ready-to-paste caption, hashtags, and Pinterest description. His active time per video: about 30 seconds.
Not a tool he bought. A system he built. One command.
Vinayak writes The Sustainable Solopreneur, a weekly newsletter for people building income streams alongside a 9-to-5…real experiments, honest results. He also shares templates, prompt packs, and playbooks on Gumroad.
Before we start…
This post is brought you by, Revid.AI

Revid.ai is an AI-powered video production platform trained on millions of viral videos to generate high-performing scripts and scroll-stopping visuals.
From product demos and explainer videos to social ads
back to the post… 👇
In this post Vinayak Ramesh walks through the whole build…the one-command demo and what actually fires in those 8–15 minutes, why he skipped CapCut and Zapier and built it in Claude Code instead, a real unedited first run (script, images, and post package straight out of the pipeline), and a full step-by-step so you can rebuild it for your own archive, copy-paste prompts and hard-won bug fixes included.
One detail worth reading closely: he runs it mostly for Pinterest, not TikTok…because a pin keeps sending traffic back to the article for months while a Reel is dead in four hours. That reframe alone is worth the read.
If you’ve got a folder full of posts you’re quietly ignoring, this is the system to steal.
Here’s Vinayak. 👇
I have a full-time research job. A Substack newsletter. A Medium account where I post three or four times a week. And somewhere in the last few months I realized I was sitting on 87 articles that had done their job once and then just... stopped.
They’re not bad pieces, some of my best writing lives in that pile. But turning any one of them into a video for YouTube, Instagram, TikTok, or Facebook meant starting from zero every time: new script, new visuals, new captions. I don’t have three extra hours a night for that. Not with a full-time job.
So I stopped trying to create more content and started asking a different question: how do I get more mileage out of the content I already have?
That’s the whole premise of this pipeline. It doesn’t write anything new. It takes an article I already published on Medium or Substack and turns it into a short-form video…same idea, same message, repackaged for a platform where people scroll instead of read. More places for people to find writing I already did the hard work on. More of those people eventually clicking through to the article, subscribing to the newsletter, sticking around.
Right now I’m running it mainly for Pinterest, on purpose. Instagram/TikTok is a firehose…a video is basically dead within 4 hours and you’re back to zero. Pinterest works more like a search engine: a decent pin keeps sending traffic back to an article for months. If I’m putting in zero extra creative energy to repurpose something, I want that repurposed version working for me long after I’ve forgotten I posted it.
Here’s what actually runs when I want a new video. One command:
TERMINAL
npm run create -- --dailyWhat happens next is it takes 8–15 minutes and needs zero input from me.
Claude Code reads one of my articles. Gemini AI writes a 50–60 second video script with 9–11 scenes. Imagen 4 generates an illustration for every scene. Remotion renders a polished 1080×1920 MP4 with animated captions, Ken Burns motion effects, and scene transitions. A metadata generator writes the complete TikTok caption, hashtags split across caption and first comment, Pinterest title, and description — formatted and ready to copy-paste.
My active time: 30 seconds to check the output.
This article is everything — every piece I built, every mistake that cost me an evening, and exactly how you can put the same thing together for whatever you’re already writing.
Why Is Repurposing So Hard to Do Consistently?
The bottleneck is never creativity. It’s activation energy.
The gap between “I should turn this into a video” and actually sitting down to do it is just large enough that it never happens consistently. Most creators solve this by trying to build better habits — scheduling time, writing scripts in advance, batching on weekends.
The only way to solve an activation energy problem is to remove the activation step entirely.
That’s what this pipeline does. It doesn’t help you make videos faster. It removes you from the video-making process almost completely. The only decision you make is whether the output is good enough to upload.
You don’t build a habit. You build a machine that runs the habit for you.
Why I Built This Instead of Using Existing Tools
Before building, I actually tried to find a shortcut.
The manual process for one video was roughly this: finish an article, open Notion and write a script doc, generate each scene image in ChatGPT one by one (9–11 separate prompts), download the images, drag them into CapCut, set timing, add captions by hand, export, then switch back to ChatGPT to write the TikTok caption and hashtags. Start to finish: 45–90 minutes per video. At one video per day, that is 22–45 hours per month just on repurposing.
I looked at alternatives. CapCut has AI features but needs manual input for every video. Descript is great for editing recorded content but does not take a text article and produce a short-form video without a recording. Make and Zapier workflows would have worked but needed a server, API keys wired together, and ongoing maintenance — three things that break at the worst possible time.
None of them do all seven things: read the article, decide which article to use, write the script, generate images, render the video, write the post package, and log the history. That is the full pipeline. Anything that only does two or three stages still leaves the other stages on your plate.
Claude Code handles the whole thing in one session of natural-language prompting. No server. No wiring. No maintenance beyond what Claude Code manages itself. That was the reason.
What Does One Command Actually Do?
When npm run create -- --daily runs, seven stages fire in sequence:
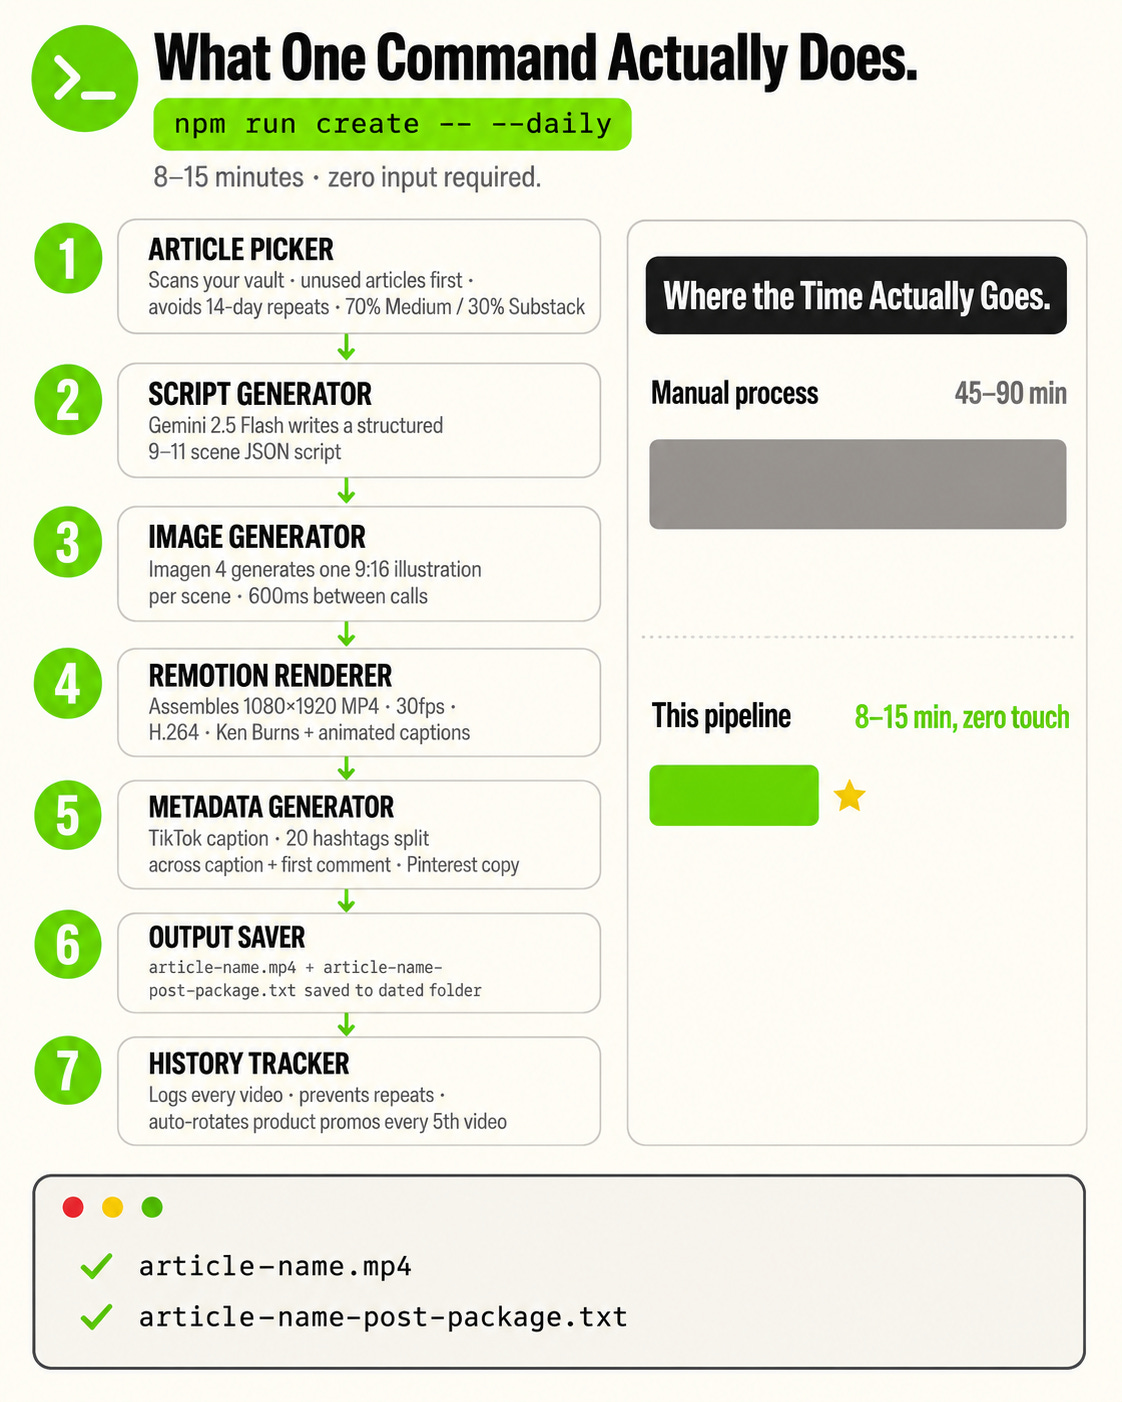
Two files come out: one .mp4 and one .txt post package. That is everything needed to upload.
What Does It Cost to Run?
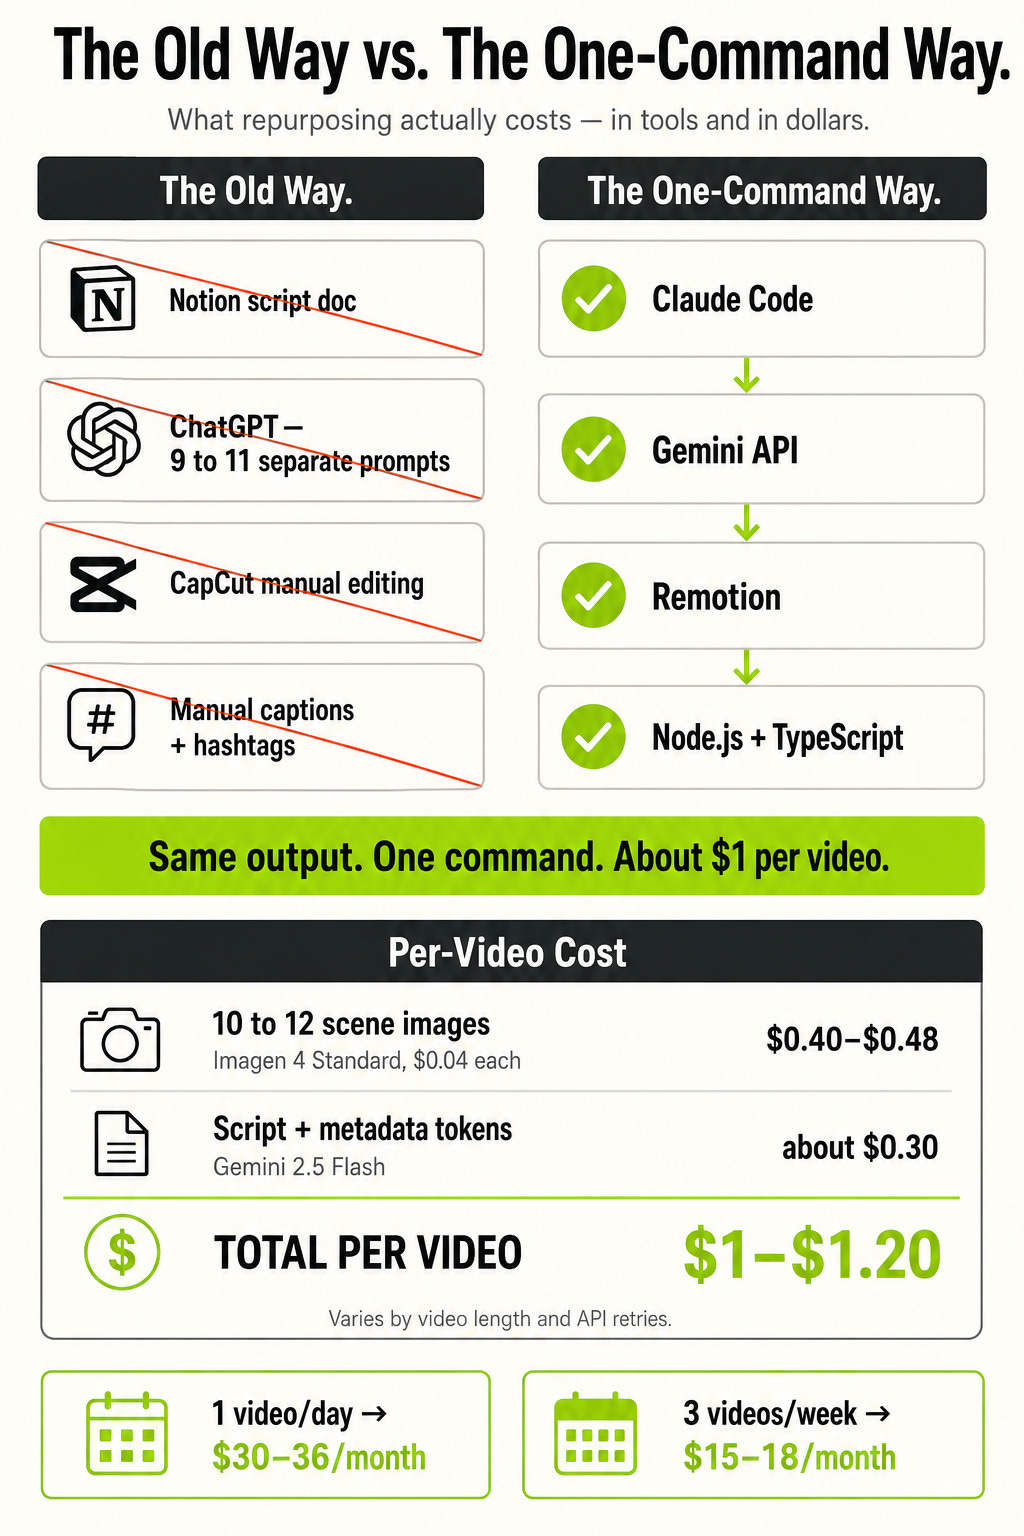
Getting your Gemini API key: Go to aistudio.google.com. Paid usage is billed per image and per token.
What Did It Actually Produce on Its First Run?
This isn’t a hypothetical. This is a real video, still live, built from an article of mine called “Why Your KDP Book Isn’t Selling.” The pipeline read the article’s tone and picked the STORY_ARC style on its own, with a PERSONAL_CONFESSION hook — problem, struggle, insight, result, told like a confession instead of a lecture. Here’s exactly what the script generator wrote:
SCRIPT BREAKDOWN — REAL OUTPUT
Article:  Why Your KDP Book Isn’t Selling
Style:    STORY_ARC
Hook:     PERSONAL_CONFESSION
Duration: 62s | 11 scenes

Hook (first 3s): “My books failed.”

All captions:
[1]  “My books failed.”
[2]  “Not bad content. Not ugly covers.”
[3]  “They just sat there, invisible.”
[4]  “The difference wasn’t quality.”
[5]  “It was one decision *before* writing a word.”
[6]  “I wrote what I *wanted* to.”
[7]  “Smart publishers find what the market *needs*.”
[8]  “Your book needs a specific, searchable keyword.”
[9]  “Validate that keyword with real market data.”
[10] “Look for niches with sales *and* low competition.”
[11] “This one shift guarantees your book gets found.”
Imagen 4 generated these directly from that script — no touch-ups, no picking favorites, this is what came out of the pipeline on the first pass:
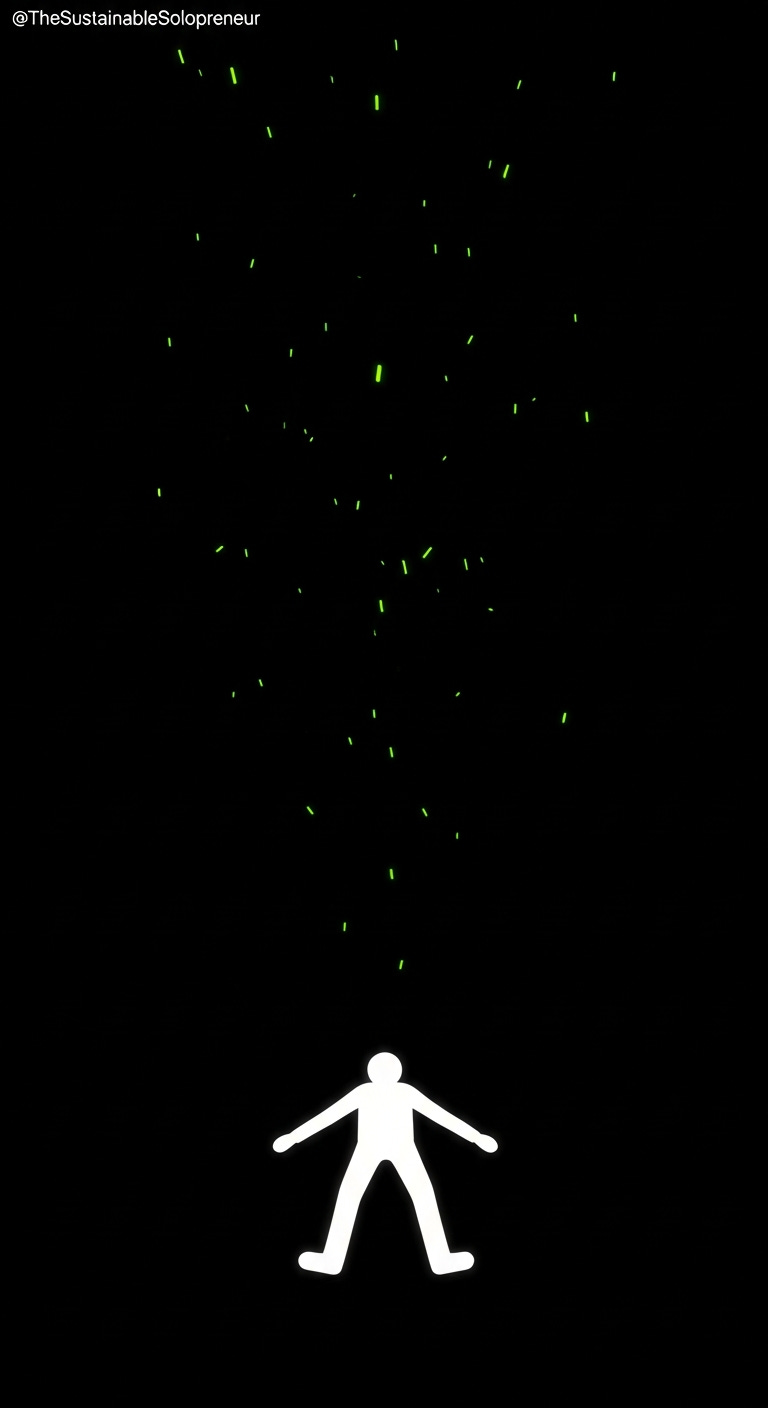
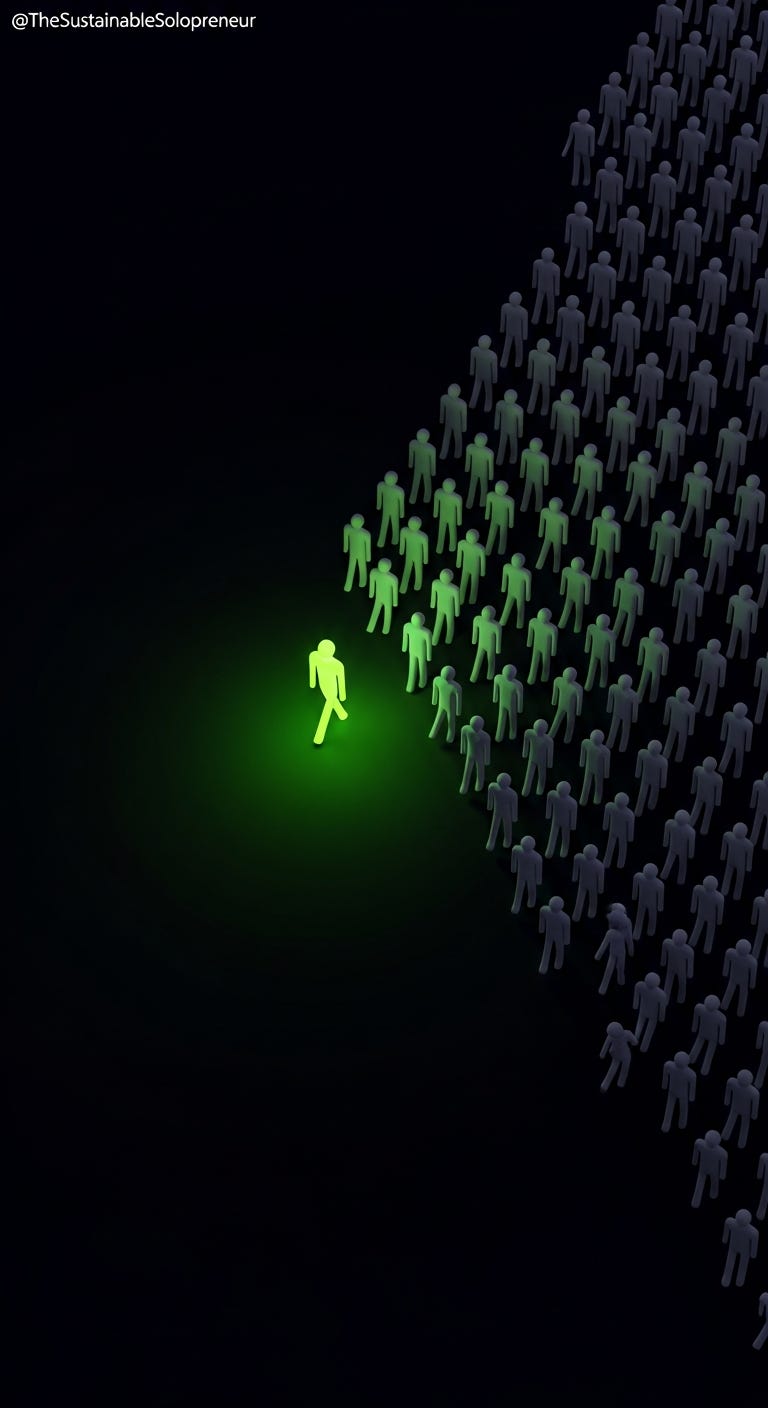
Scene 1 — “My books failed.”
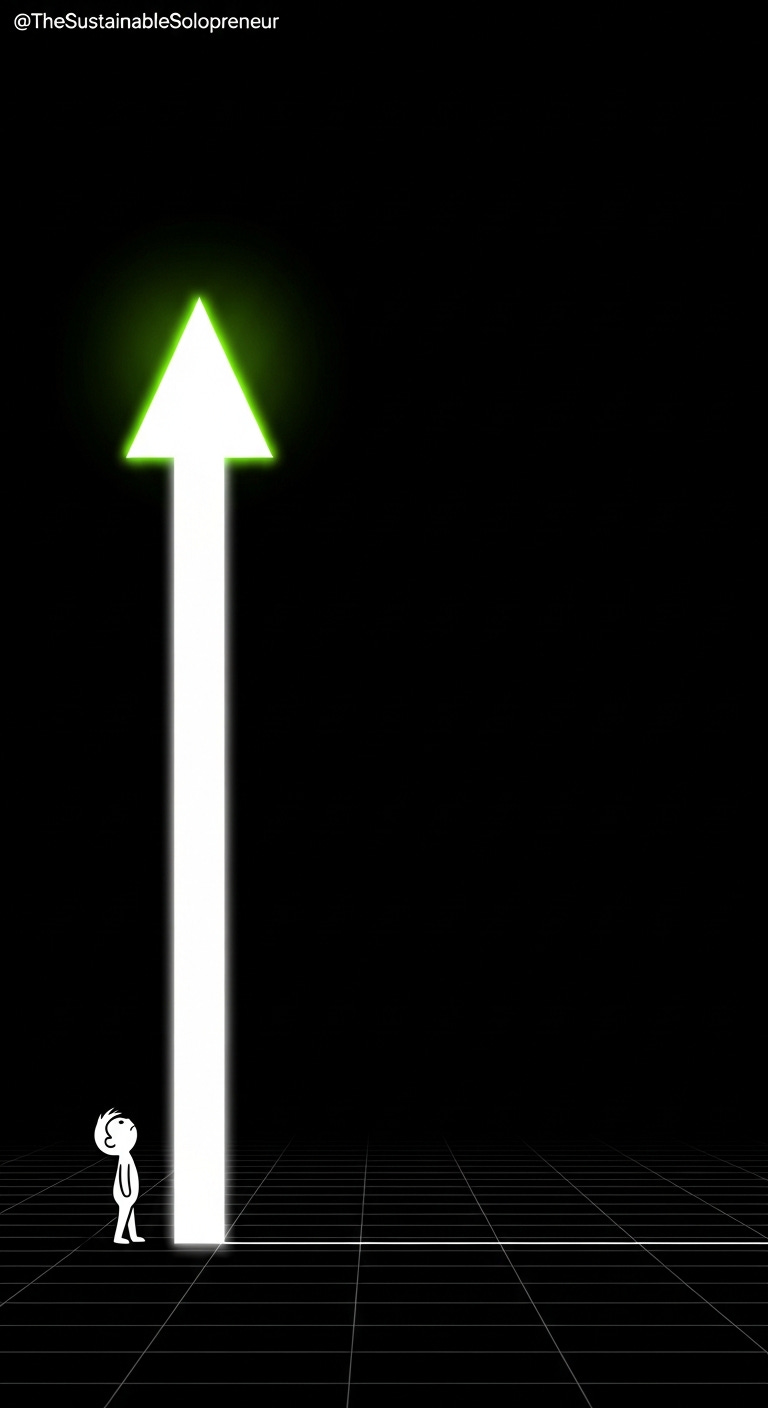
Scene 3 — “They just sat there, invisible.”
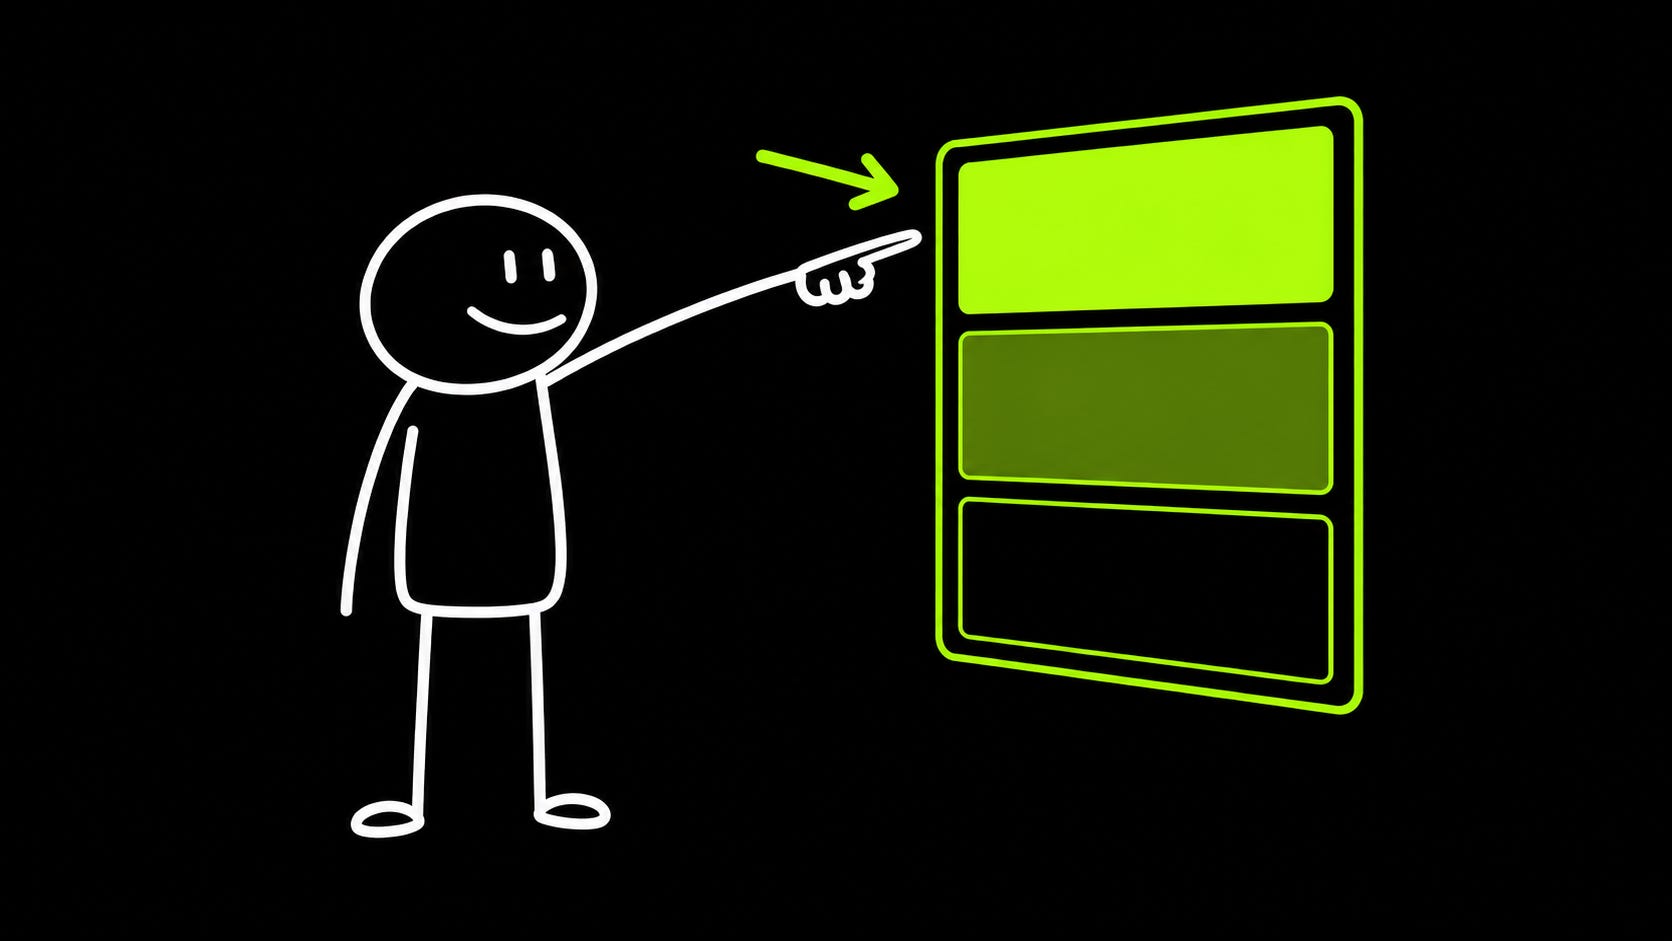
Scene 8 — “...a specific, searchable keyword.”
Actual scene stills, 9:16, straight out of the pipeline — no edits.
Remotion assembled all 11 into the MP4. Then the metadata generator wrote this — also real, also unedited:
METADATA GENERATOR OUTPUT — REAL OUTPUT
TIKTOK / REELS

On-Platform Title:
My KDP Books Flopped: The Invisible Reason Yours Aren’t Selling

Caption:
My KDP books were amazing, but nobody bought them. Turns out, content
quality wasn’t the issue. Discover the secret to making your KDP books
visible and profitable. Follow for more solopreneur insights!
#TheSustainableSolopreneur #stickfigure #solopreneur #newsletter
#tiktoksolopreneur #reels #tiktokcreator #substackgrowth #onlinewriting
#buildinpublic

First Comment (post immediately after):
#KDP #SelfPublishing #AmazonKDP #BookMarketingTips #IndieAuthor
#KindleBooks #AuthorLife #BookLaunch #DigitalProducts #PassiveIncomeBooks

PINTEREST

Title:
KDP Book Not Selling? The #1 Reason It’s Invisible (And What To Do)

Description:
Your KDP book might have great content and a stunning cover, yet it’s
gathering dust. The problem isn’t quality, it’s visibility. Discover why
many self-published books fail to sell and the key difference that
drives sales. Stop letting your hard work go unseen.
#TheSustainableSolopreneur #stickfigure #solopreneur #newsletter
Active time from command to a finished post package: under fifteen minutes, almost all of it spent watching the terminal scroll. My time involved: pressing enter, then hitting upload once the file was ready.
I opened the MP4, copied the Pinterest title and description straight out of the .txt, and uploaded. It’s been sitting on Pinterest since, quietly doing its job.
This exact video, live on Pinterest
How Does the Pipeline Get Smarter Over Time?
The first run treats every article as a fresh start. By week three, the pipeline has compounding logic working in three directions.
The article picker learns recency. It tracks every article that has been turned into a video, with the date. After 14 days, a used article becomes eligible again — but with freshAngle: true set, which tells the script generator to find a completely different angle on the same content. One article can become three or four videos over months without repeating itself.
The history tracker learns cadence. shouldPromoteGumroad() returns true every fifth video (totalVideos % 5 === 0). On those runs, the metadata generator includes a product mentioned in the caption automatically— something like “If you want the exact framework, grab the Substack Growth Engine“ with the link swapped in…You never have to remember to promote your products. The pipeline rotates it on a schedule.
The style logic learns variety. The first version cycled the same 10 visual types in a fixed rotation. I expanded it to 20 types with emotion-register-aware selection — no two adjacent scenes share the same type, the first scene always uses a high-emotion hook type, and the last scene always uses a payoff type. Every run looks different from the last one.
Day one it is a production machine. Month three it is an efficient production machine that knows your content catalog.
Inside the Pipeline: How Each Stage Works
How Does the Article Picker Decide What to Use?
The picker follows a strict priority order:
Never-used articles — highest priority
Rested articles — used more than 14 days ago, eligible again
Recently used — last resort fallback only
It also weights by platform: 70% Medium, 30% Substack. Short-form video drives more referral traffic back to Medium, so Medium articles get first pick.
How Does the Script Generator Work?
The cleaned article text goes into Gemini 2.5 Flash with two settings that most people get wrong on the first attempt:
TYPESCRIPT
responseMimeType: “application/json”  // forces structured output, no markdown
wrapping
maxOutputTokens: 8192                  // prevents mid-JSON truncation
Without responseMimeType: “application/json”, Gemini wraps the output in markdown fences. Without maxOutputTokens: 8192, it truncates mid-JSON on longer scripts and throws a parse error. Both mistakes cost debugging time I already paid for.
The model returns a hookStyle and a scenes array. Each scene contains durationSeconds, caption (max 15 words), optional subCaption (max 8 words), imagePrompt, and visualType.
The pipeline chooses from 6 video styles based on the article’s tone and structure:
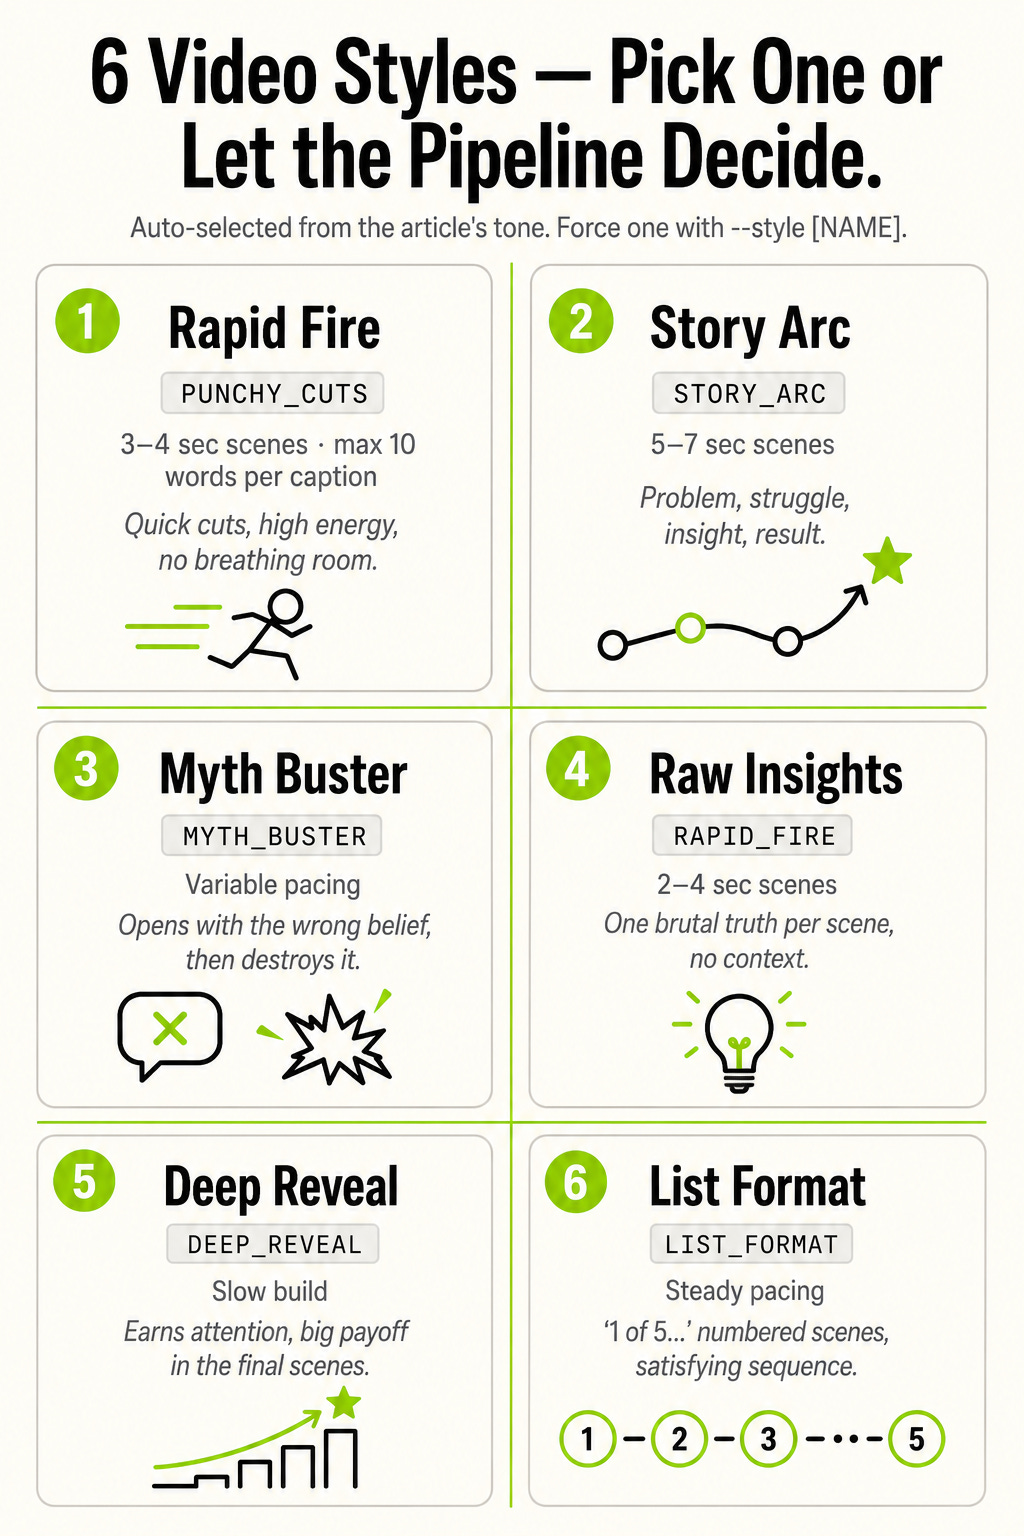
20 visual types are assigned by an algorithm — not a fixed rotation. First scene: always a high-emotion hook type (SOLO_REACTION, COUNTDOWN_CLOCK, SPOTLIGHT_SOLO, MEME_ROCKBOTTOM). Middle scenes: rotate through emotional registers — no two adjacent scenes share the same type. Last scene: always a payoff type (CELEBRATION, MOUNTAIN_SUMMIT, STAT_HERO).
Every image prompt also gets a perspective layer (one of 8 camera angles) and an atmosphere layer (one of 8 background treatments) added automatically. This means two videos with the same visual type will still look compositionally different.

How Does the Image Generator Avoid Bad Output?
Each scene’s prompt goes to Imagen 4 first, with a fallback if it fails.
Primary model:
TYPESCRIPT
const result = await ai.models.generateImages({
model: “imagen-4.0-generate-001”,
prompt: scene.imagePrompt,
config: { numberOfImages: 1, aspectRatio: “9:16” }
});
Fallback model:
TYPESCRIPT
const result = await ai.models.generateContent({
model: “gemini-3.1-flash-image”,
contents: scene.imagePrompt,
config: { responseModalities: [”IMAGE”, “TEXT”] }
});
There is a 600ms delay between calls to avoid rate limiting. Images are cached to disk — if the pipeline crashes mid-run, already-generated images are skipped on restart.
Three rules that took the most trial and error to figure out:
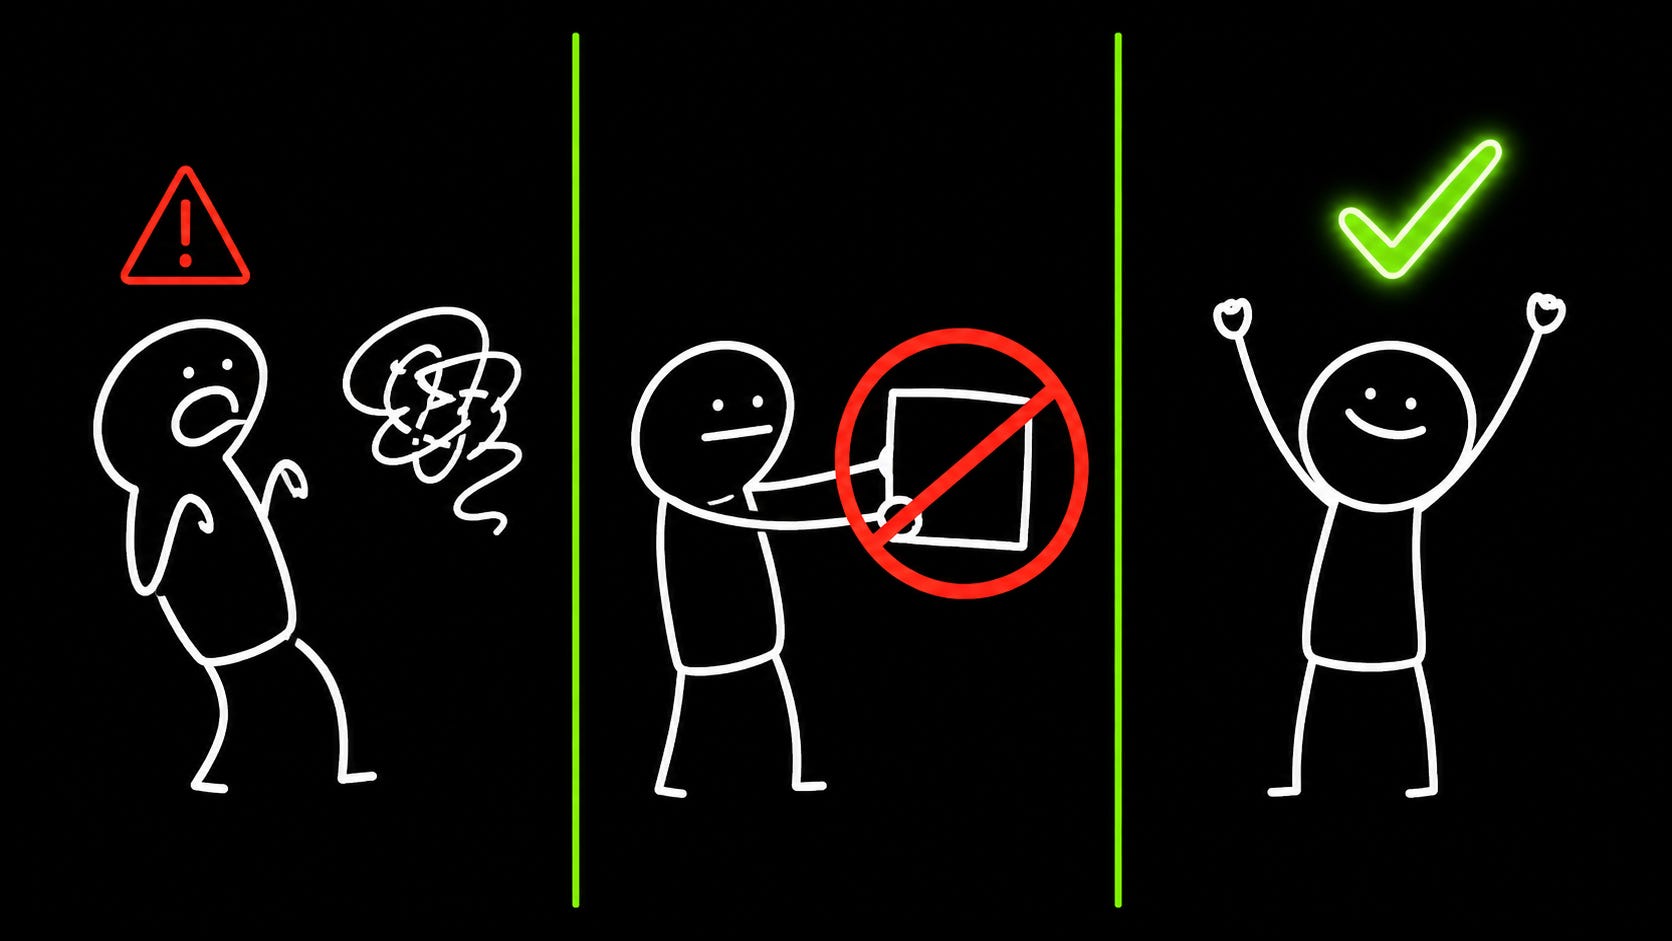
Never use hex codes in image prompts. #7DC242 will appear as literal floating green text. Use plain English instead: “vivid neon lime green.”
Never describe text or letters in scene compositions. Even “a sign with an X” will cause the model to render actual characters.
End every image prompt with: “CRITICAL: absolutely zero text, numbers, hex codes, or letters anywhere in this image.”
How Does Remotion Render the Video?
Remotion renders React components into video frames. Output: 1080×1920, 30fps, H.264.
The one thing that breaks every first-timer’s setup: Remotion runs inside a browser sandbox and cannot load file:// paths. Every image needs to be converted to a base64 data URI before being passed to the React component. This happens in scenesToDataURIs() before rendering starts. Skip this step and your video renders as black frames.
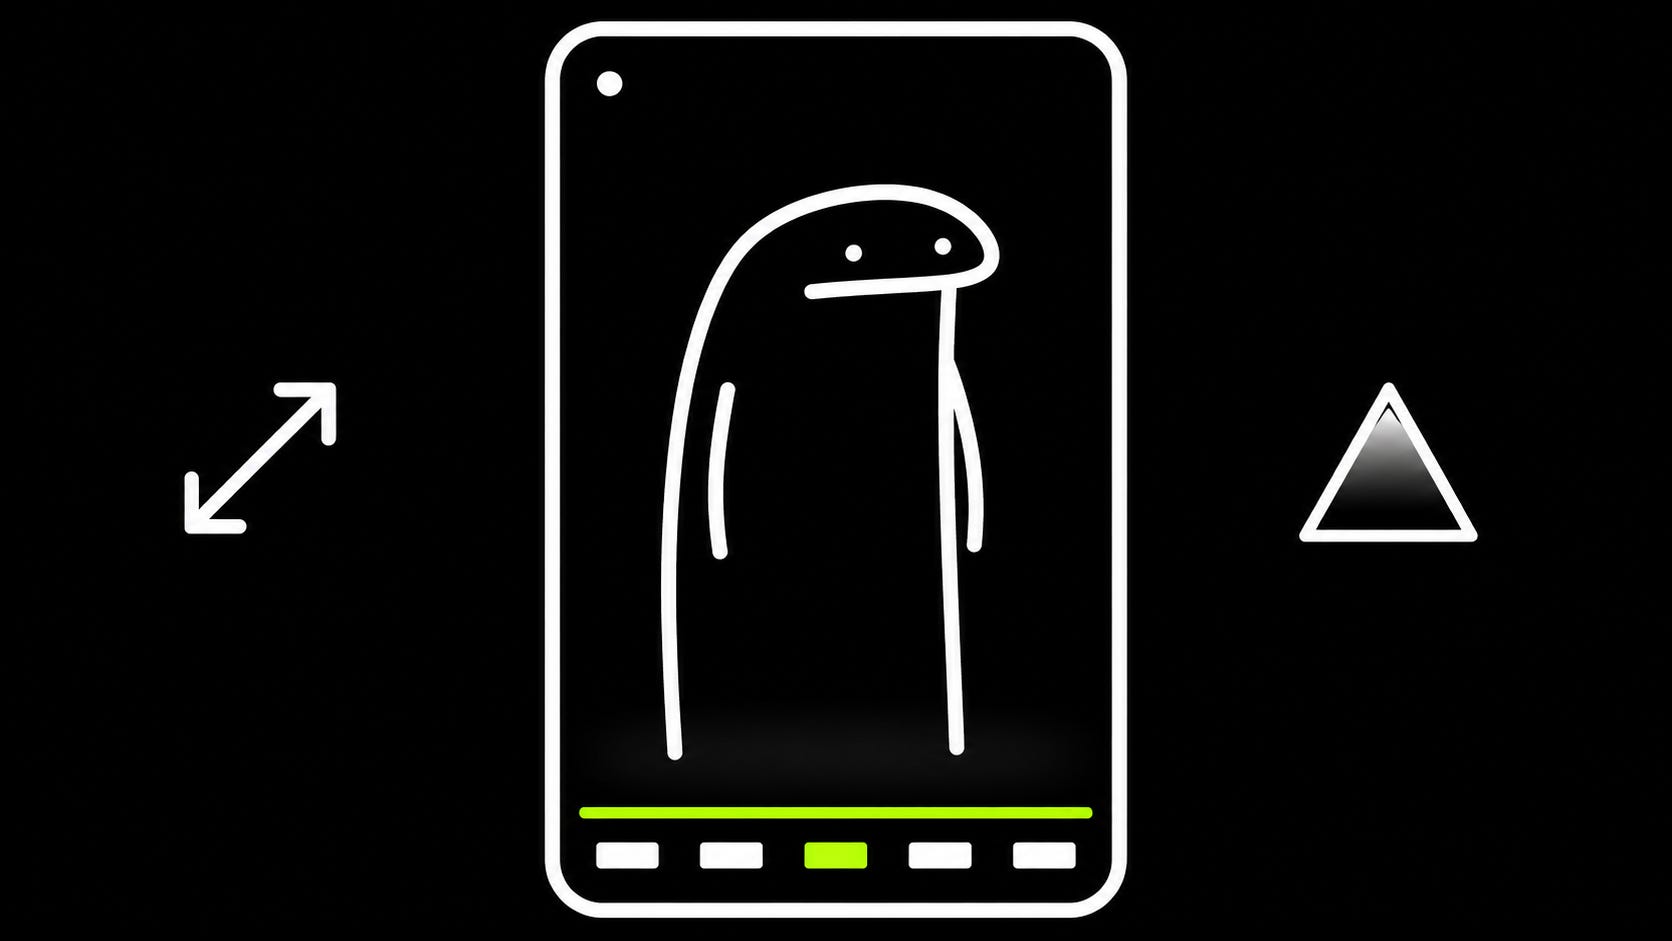
Each scene in Scene.tsx gets a full-frame image, a Ken Burns effect (8 preset zoom/pan variations cycling per scene), bottom and top vignettes, a watermark in the top-left corner at 40% opacity, and a 9-frame fade in/out at each scene boundary.
Caption animation in Caption.tsx rotates through 3 styles: word-by-word (synced to frame timing), highlight (current word glows in your accent color), and all-at-once (spring animation slide-in for the full line). A lime green accent bar animates on entry. SubCaption sits below in your brand color.
What Does the Metadata Generator Produce?
Once the video renders, one final Gemini call writes the complete post package:
videoTitle — TikTok/Reels on-platform title
captionBody — 2–3 sentence hook caption
20 hashtags split across two groups: first 10 in the caption, next 10 in the first comment (TikTok best practice for reach)
firstComment — the second 10 hashtags, paste immediately after uploading
pinterestTitle — SEO-optimized curiosity-gap hook
pinterestDescription — 2–4 sentence tease with hashtags
Everything formats into a .txt file with clearly labeled sections. No editing required before posting.

How Do You Build This From Scratch?
Step 1 — Create the Project
Inside your content vault or any folder:
TERMINAL
mkdir _VideoMaker && cd _VideoMaker
npm init -y
Where Do Your Articles Actually Come From?
I use an Obsidian vault, so article-loader.ts reads .md files out of a folder and article-picker.ts chooses between them automatically. That’s my setup — it doesn’t have to be yours.
The pipeline doesn’t care where your content lives. All article-loader.ts needs is a string of plain text. Three ways people actually do this:
You already have a vault or folder of articles (Obsidian, a
content/folder, whatever). Buildarticle-loader.tsandarticle-picker.tsexactly as described in Step 6 — point them at that folder, and the picker rotates through everything in it automatically.Your content lives in Notion. Export the page as Markdown (Notion: •••
→ Export → Markdown & CSV), drop the exported .md file into a folder, and pointarticle-loader.tsat that folder instead. Nothing downstream changes — Gemini doesn’t know or care that the text came from Notion.You just want to paste one article and go. Skip the picker logic entirely. Copy your published post straight from Substack or Medium, paste it into a single
.txtfile, and tell Claude Code to build a stripped-downarticle-loader.tsthat just reads that one file — no priority queue, no rotation, no --daily flag. Run it withnpm run create -- --article “your-file-name”whenever you have something new to repurpose.
If you’re only repurposing a handful of pieces a month, option 3 is genuinely the easier build. The article picker’s 14-day recency logic only starts paying for itself once you have a real backlog — mine only became worth automating after I hit 87 unused articles.
Step 2 — Install Dependencies
TERMINAL
npm install \
[email protected] \
@remotion/[email protected] \
@remotion/[email protected] \
@remotion/[email protected] \ @google/genai \
tsx gray-matter dotenv \
react react-dom \
@types/react @types/react-dom \
typescript
⚠️ All four Remotion packages must share the same version number. Do not install @remotion/core separately — it has a different versioning scheme and will break your build.
Step 3 — Configure TypeScript
Create tsconfig.json:
TSCONFIG.JSON
{
“compilerOptions”: {
  “target”: “ES2020”,
  “module”: “CommonJS”,
   “moduleResolution”: “node”,
   “jsx”: “react”,
   “esModuleInterop”: true,
   “strict”: true,
   “outDir”: “dist”
 },
“include”: [”src”]
}
Step 4 — Add Your API Key
Create .env in the project root:
.ENV
GEMINI_API_KEY=your_gemini_api_key_hereAdd the run script to package.json:
PACKAGE.JSON
“scripts”: {
”create”: “tsx src/cli.ts”
}
Step 5 — Define Your Brand Guidelines Before Writing Any Code
This is the step most tutorials skip and it is the most important one.
The pipeline encodes your brand into every image prompt and every rendered frame. If you skip this, all your videos will look generic. Before you touch the code, answer four questions:
What is your visual style? The illustration style for every scene image. Minimalist stick figures, flat vector illustration, cartoon characters, geometric shapes, photorealistic backgrounds.
What are your brand colors? You need three values — background, accent (captions, highlights, bars), and text. Always describe colors in plain English inside prompts. Never use hex codes — image models render them as literal on-screen text.
What is your watermark? Your handle or brand name, shown in the top-left corner of every scene at 40% opacity.
What is your target video duration? Default is 50–60 seconds with 9–11 scenes. Adjust in the script generator’s system prompt for shorter or longer content.
Once you have your answers, paste this into Claude Code:
COPY-PASTE PROMPT
I’m building a short-form video pipeline. Before we write any code,
I need to define my brand guidelines so Claude can encode them into
every image prompt and rendered frame.

Visual style: [describe your illustration style]
Background: [describe in plain English — e.g. “deep solid black”]
Accent color: [describe in plain English — e.g. “vivid neon lime green”]
Text color: [e.g. “bright white”]
Watermark: [@YourHandle]
Target duration: [e.g. “50–60 seconds, 9–11 scenes”]
Create a brand guidelines object I can reference throughout the
pipeline build. Write the image prompt style description in plain
English — no hex codes inside prompts.
Here is what mine looked like:
MY FILLED EXAMPLE
My visual style: Flork-style minimalist stick figures — simple,
expressive, slightly chaotic energy. Every scene should feel like
a comic panel.

Background: Deep solid black
Accent color: Vivid neon lime green
Text: Bright white
Watermark: @TheSustainableSolopreneur
Duration: 50–60 seconds, 9–11 scenes
One rule: never use hex codes in image prompts. Describe every
color in plain English. Always end every image prompt with:
CRITICAL: absolutely zero text, numbers, hex codes, or letters
anywhere in the image.
Claude already knew what Flork-style stick figures looked like from its training. From that single briefing, every image prompt it generated for the rest of the session described scenes in my exact visual language without me repeating the brief each time. Brief once. The pipeline carries it forward.
What If You Don’t Want Stick Figures?
Everything in this article uses my brand — Flork-style stick figures, black background, lime green accents because that’s what fits my brand. None of that is hardcoded into the pipeline. It all comes from the one paragraph you wrote above.
Swap that paragraph and every image prompt the pipeline generates changes with it, because the script and image generators both inherit whatever visual style description you gave Claude Code — they don’t have a fixed style baked into the code. A few descriptions that work well if stick figures aren’t your brand:
Flat vector illustration: “Flat 2D vector illustration, bold geometric shapes, limited 4-color palette, no gradients, editorial explainer style.”
3D isometric: “Isometric 3D render, soft studio lighting, rounded plastic-toy aesthetic, single accent color, clean shadows.”
Paper-cutout collage: “Layered paper-cutout collage style, visible paper texture and drop shadows, muted craft-paper palette.”
Photoreal B-roll style: “Photorealistic stock-photo style, shallow depth of field, natural lighting, no illustrated elements at all.”
Anime / manga: “Clean manga-style line art, screentone shading, expressive faces, monochrome with one spot color.”
Whichever you pick, keep the same three rules from above: describe every color in plain English, never ask for on-screen text or letters, and end every prompt with the zero-text instruction. Those rules aren’t stick-figure-specific — they’re about what image models get wrong regardless of style.
Step 6 — Build with Claude Code
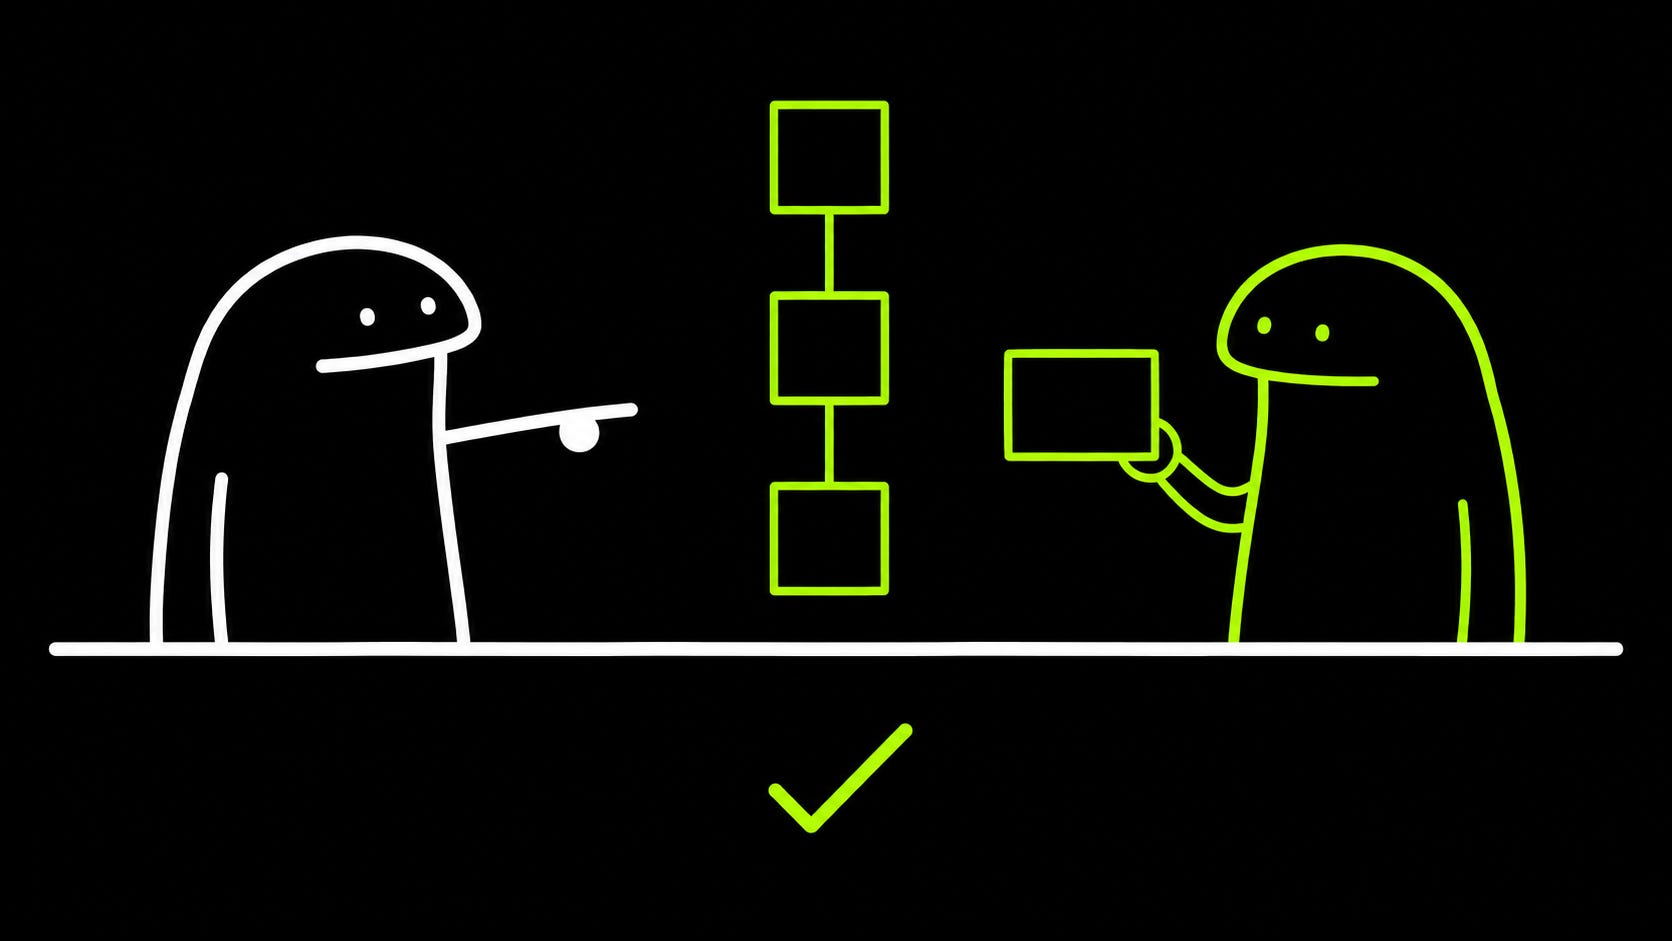
Build each module in this order:
BUILD ORDER
1.  types.ts
2.  article-loader.ts
3.  script-generator.ts
4.  image-generator.ts
5.  renderer.ts
6.  article-picker.ts
7.  history-tracker.ts
8.  metadata-generator.ts
9.  cli.ts
10. remotion/components/Scene.tsx
11. remotion/components/Caption.tsx
Describe what you want in plain English for each module. Claude Code handles the TypeScript types, API call structure, error handling, and JSON parsing. You correct the output, iterate, and move to the next module. The entire build took me one session of about 2–3 hours, including all the debugging.
Step 7 — Run It End to End With Your Own Article
Everything above gets you a working pipeline. Here’s what to actually do with it, start to finish, the first time.
Drop one of your own articles into your content folder. Whatever you decided above — a .md file from your vault, a Notion export, or a .txt file pasted straight from a live post. Use something you’ve already published; you want to judge the output against writing you already know well.
Run the script-only pass first. npm run create -- --article “your-article-name” --script-only. This skips images and rendering entirely and just prints the script JSON — hook style, video style, and every scene’s caption. Read it before you spend a cent on image generation. If the captions feel off, that’s a script-generator prompt problem, not an image problem — fix it here.
Run the full command once the script looks right. npm run create -- --article “your-article-name”. Watch the terminal: the article gets picked up, the script generates, then a run of image-generation calls (roughly one every 600ms–2s depending on the API), then the Remotion render logs, then the metadata generation, then a final line confirming the save location.
Open the output folder. You’ll have two files: the .mp4 and the -post-package.txt. Watch the video first, full screen, sound off — most people watch short-form muted, so if the captions alone don’t tell the story, fix that before you post.
Copy the post package and upload. The .txt file already has your title, caption, hashtags, and Pinterest title/description written out. Paste, don’t rewrite — that’s the entire point of the pipeline.
Log what worked. Nothing in the code does this part for you. After each upload, jot one line — which hook style landed, which visual type felt flat — in a plain notes file. That’s the manual half of the feedback loop from the brand-brief step, and it’s the difference between a pipeline that stays static and one that gets sharper every week.
The Full Folder Structure
FOLDER STRUCTURE
_VideoMaker/
├── package.json
├── .env
├── src/
│   ├── cli.ts                     ← entry point, orchestrates all stages
│   ├── types.ts                   ← shared TypeScript interfaces
│   ├── remotion/
│   │   ├── index.ts               ← registers the Remotion composition
│   │   └── components/
│   │       ├── Scene.tsx          ← image + Ken Burns + vignette + watermark
│   │       └── Caption.tsx        ← animated caption component
│   └── pipeline/
│       ├── article-loader.ts      ← reads .md files, strips CTAs
│       ├── script-generator.ts    ← calls Gemini, returns structured script
│       ├── image-generator.ts     ← calls Imagen 4, caches to disk
│       ├── renderer.ts            ← Remotion bundler + renderMedia
│       ├── article-picker.ts      ← priority-weighted article selection
│       ├── history-tracker.ts     ← logs videos, tracks cadence
│       └── metadata-generator.ts  ← TikTok + Pinterest post package
├── temp/                          ← working images per job (auto-cleared)
├── output/
│   └── 2026-06-25/
│       ├── article-name.mp4
│       └── article-name-post-package.txt
└── logs/
    └── video-history.json
Useful Copy-Paste Prompts to Start
Four prompts run the whole system once it’s built. Paste them as-is.
TERMINAL
# Daily auto-pick
npm run create -- --daily

# Specific article by name (swap in your own title/filename)
npm run create -- --article "Your Article Title Here"

# Force a style
npm run create -- --daily --style MYTH_BUSTER

# Preview just the script structure (fast, no images, no render)
npm run create -- --daily --script-only

# Generate images only, skip render
npm run create -- --daily --no-render

# List all available articles
npm run create -- --list
What Breaks and How to Fix It
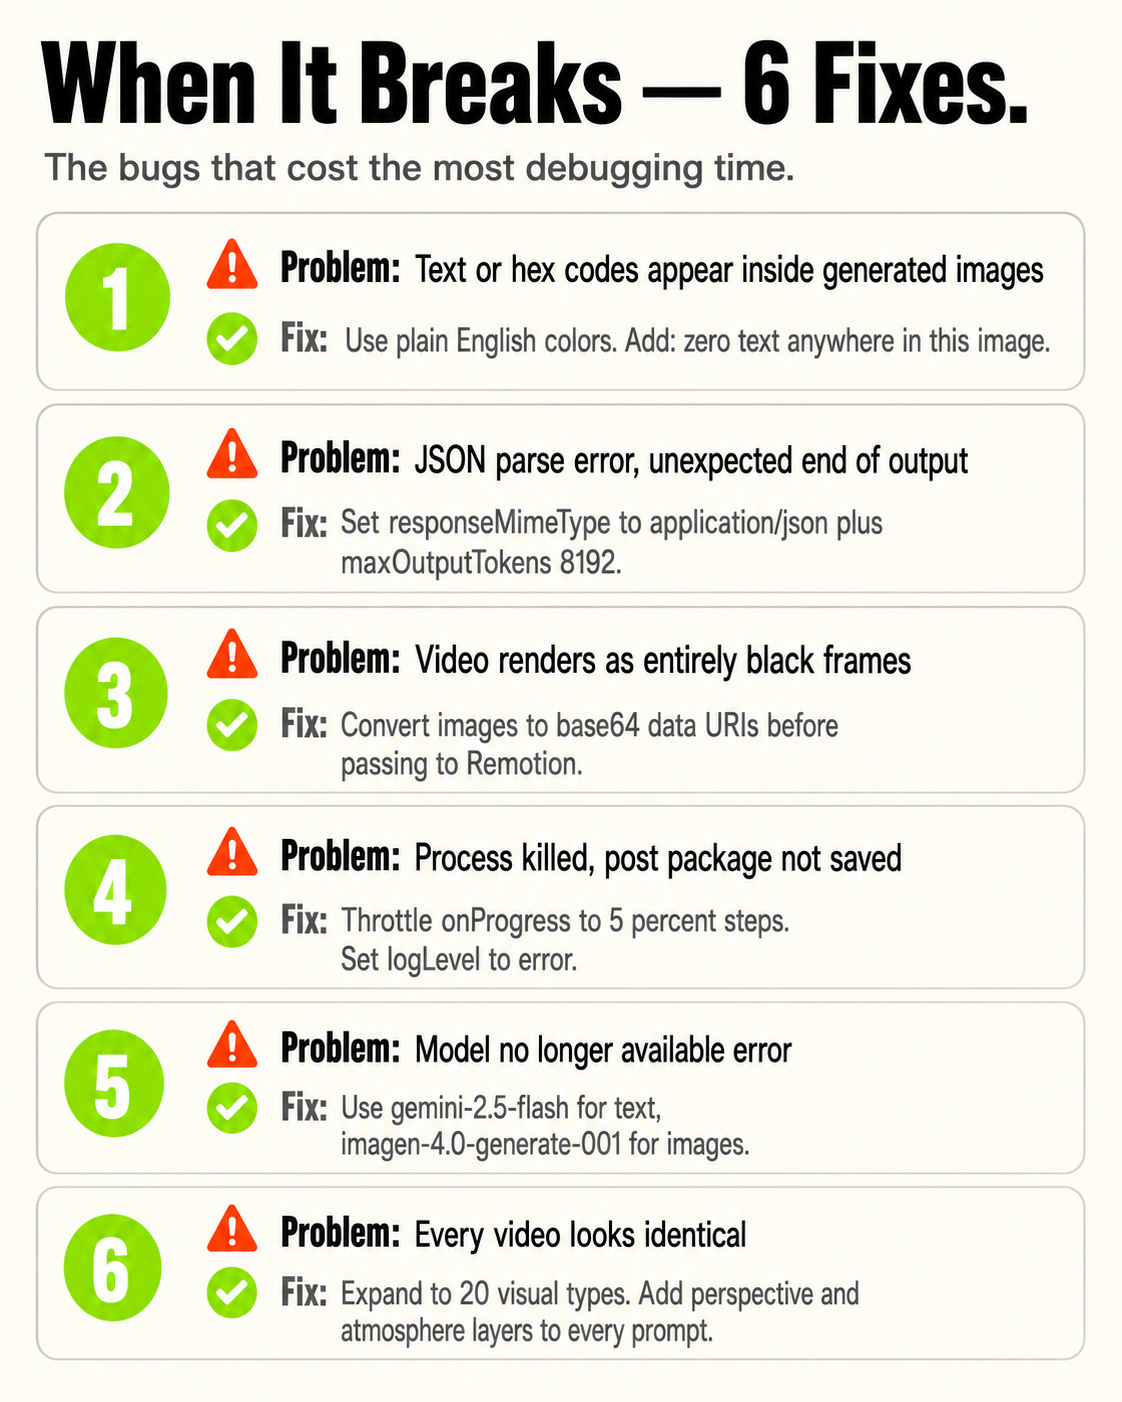
The full detail on each problem and what caused it:
Problem 1 — Hex codes appearing as text in images. Imagen 4 rendered #7DC242 as literal floating green text. Fix: plain English colors only, plus the CRITICAL no-text instruction at the end of every prompt.
Problem 2 — JSON truncation mid-output. Error: Expected ‘,’ or ‘]’ after array element. Fix: responseMimeType: “application/json” to force structured output, AND maxOutputTokens: 8192. The default limit was too low for 11-scene scripts.
Problem 3 — Black frames. Images were passed as file:/// paths. Fix: convert everything to base64 data URIs in scenesToDataURIs() before calling renderMedia().
Problem 4 — Process killed after rendering. Remotion’s onProgress fires on every frame — 1,800 calls for a 60-second video. Writing to stdout 1,800 times overflowed the buffer, killing the process before the post package saved. Fix: throttle to ≥5% increments, add logLevel: “error”.
Problem 5 — Wrong model names. gemini-2.0-flash was deprecated. Fix: use gemini-2.5-flash for text and imagen-4.0-generate-001 via generateImages() for images.
Problem 6 — Imagen 4 safety filter error. Error: Only block_low_and_above is supported. Fix: remove the safetyFilterLevel parameter entirely. Don’t pass it at all.
Problem 7 — Article loader stripping too much content. The CTA stripper matched on the keyword “subscribe” and deleted entire paragraphs that used the word in passing. Fix: target the specific CTA block structure — the three-paragraph block at the end of each post — rather than individual keywords anywhere in the article.
Problem 8 — Every video looking identical. The first version cycled the same 10 visual types in a fixed rotation. Fix: expand to 20 types, add emotion-register-aware selection (no adjacent repeats, hook-specific first scene, payoff-specific last scene), and add perspective and atmosphere layers to every image prompt.
What Mistakes Should You Avoid?
The four that quietly break the system:
Skipping the brand brief. Defining your visual style, colors, and watermark before writing any code is what makes every video look like yours. Skip it and you get generic output that could belong to anyone. The brief takes ten minutes. Skip it and you waste three hours on output you do not want to post.
Using hex codes in image prompts. This one will burn you on the first run. #7DC242 becomes floating on-screen text. There is no workaround — plain English is the only option. Write it into every single image prompt, not just the system instructions.
Running Remotion without base64 conversion. It renders black frames silently. No error. No warning. Just a black video at the end of a 12-minute run. Always call scenesToDataURIs() before renderMedia().
Skipping the per-run notes on what worked. The history tracker tells the pipeline what has been done. Your own notes — which outputs were strong, which were mediocre, what you changed — are the feedback loop that makes the brand brief sharper over time. Skip them and the pipeline stays exactly as smart as day one.
Key Takeaways
The bottleneck is activation energy, not creativity. You don’t need better habits. You need a machine that removes the activation step entirely.
Claude Code handles the full build in one session. Describe each component in plain English, iterate on the output, move to the next module. Two to three hours, start to finish.
The article picker has compounding logic. Unused articles go first. After 14 days, used articles become eligible again with freshAngle: true — a different angle on the same content. One article can become multiple videos over time.
Never use hex codes in image prompts. Image models render them as literal on-screen text. Plain English only. Add the CRITICAL no-text instruction to every prompt.
`responseMimeType: “application/json”` and `maxOutputTokens: 8192` are non-negotiable. The defaults fail on longer scripts. Set them before your first run.
Convert all images to base64 before Remotion. Local file paths don’t work in its browser sandbox. Black frames are the symptom.
Define your brand before writing a single line of code. Brief Claude Code once. It carries the brand context through the entire session without you repeating it.
The One Thing to Do This Week
Don’t try to build the full pipeline today.
Start with Step 5 — define your brand guidelines. Answer the four questions. Write the brief. Open Claude Code and paste it.
Then prompt the script generator as the first module:
COPY-PASTE PROMPT
Build script-generator.ts. It takes a string of article content
and calls Gemini 2.5 Flash with responseMimeType: "application/json"
and maxOutputTokens: 8192 to return a structured video script JSON.

Output format:
{
  hookStyle: string,
  videoStyle: "PUNCHY_CUTS" | "STORY_ARC" | "MYTH_BUSTER" |
              "RAPID_FIRE" | "DEEP_REVEAL" | "LIST_FORMAT",
  scenes: [{
    durationSeconds: number,
    caption: string,
    subCaption?: string,
    imagePrompt: string,
    visualType: string
  }]
}
Apply these brand guidelines to every imagePrompt:
[paste your brand brief here]

Set up the project with package.json, tsconfig.json, and .env
for GEMINI_API_KEY.
Paste one of your articles in. Run it. Read the script output.
If the scripts look right, add the image generator next. Then Remotion. Build stage by stage.
You already have the content. You already have Claude Code. The only thing missing is the pipeline.
If you build this, I want to see what it produces for your content — comment here or DM me on Substack.
One last thing from me
The part of Vinayak’s build I keep coming back to isn’t the pipeline. It’s the reframe:
the bottleneck was never creativity…it was activation energy.
And the fix wasn’t more discipline. It was a machine that deleted the step entirely.
That’s the whole thing I hammer on here. Systems, not hustle. Build it once, let it run.
You don’t need 87 articles to start. You need one post you’ve already published and a free afternoon. Do exactly what Vinayak says: don’t build the whole pipeline today…just write the brand brief and get the script generator working.
That’s the first domino. Everything downstream falls from there.
If this was useful, go subscribe to Vinayak at The Sustainable Solopreneur…real experiments, honest results, the kind of tested building this newsletter runs on.
And if you want more systems built exactly like this…lean, one-command, doing the work while you sleep…that’s the entire point of The Lean AI-Powered Business Playbook for Creators. It’s how you go from “I should automate that” to actually running it.
One more thing. If you’ve been getting value from these breakdowns and want the full playbooks, the build-alongs, and everything I don’t publish for free, here’s why it’s worth upgrading to premium. Come build with me on the inside.
— Sharyph
Pinterest over tiktok for the long tail traffic is the smartest detail in here.
This is a great post , Vinayak Ramesh i am so happy for you , I am technically challenged but i think i might try this !